Showing posts with label seasonal. Show all posts
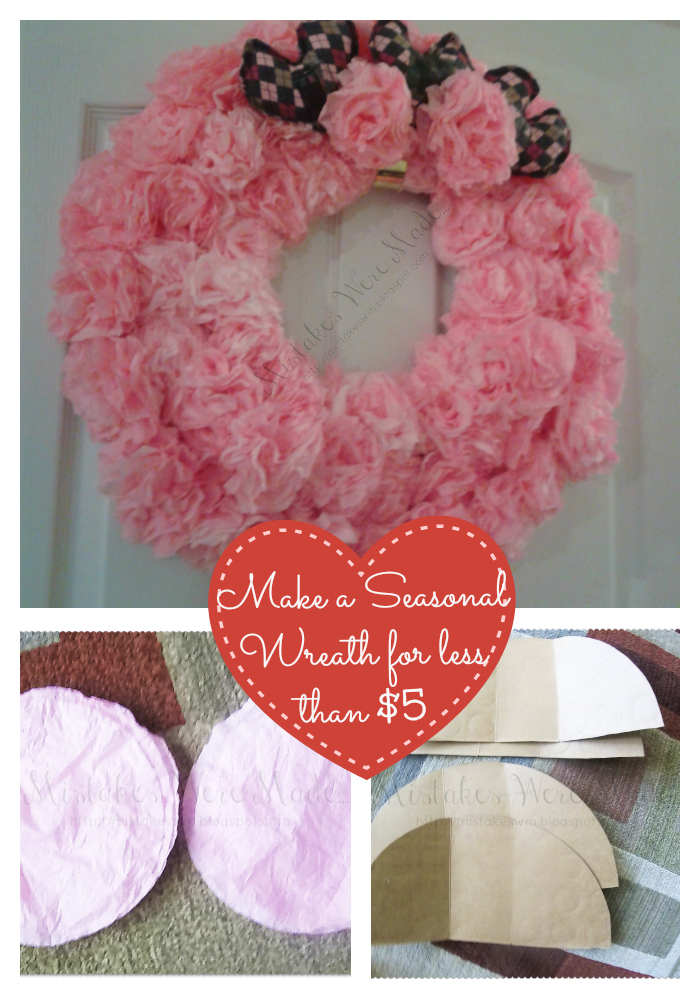
Yes, I know I said I would post this Sunday and I dint. What can I say, I have a life :) plus I just finished my wreath tonight. Those dam flowers took forever to make. I seriously hate making those flowers.
You have no idea what I'm talking about do you? Well you will find out once you start making them for this Wreath.
Well lets get to it then...


Materials:

Coffee filters ( I used about 300 on this wreath)
Food coloring
Tape
stapler
Scissors (Not your fabric scissors!)
Card Board boxes ( I used 4 12 pack beer/soda boxes)
Glue gun with glue

*Please read all directions before starting project.


1. Grab a huge bowl put 2 cups of water in it, add your food coloring until you get the desired color.

2. Separate coffee filters ( I did 10 at a time) and submerge them in the bowl. Gently wring them out and pile them in a Tupperware till you do about 100 of them.

3. Once that is done, stick them in your dyer on low. You can let them air dry but that will take at least a day to do and no one has time for that. keep an eye on them. I only put mine in for 10 minutes. Do not walk to far away from your dyer, you don't want to start a fire so watch them carefully.

4.once they are dry, they are going to be so wrinkly. You can Iron them if you want but I did not iron mine. Unfold them and stack them by 6.


5.Fold them in half and cut the edge so that it has that scalloped effect.


6.Keep them stacked, put your hand under the pile and pinch them from the bottom.


7. Pinch the bottom all together.


8.And staple the bottom.


9.lay it out flat once again and spread the petals.


10. Take your first layer ( you should have 6) and pinch it together so that it forms the petals.


11. Keep doing so till you get to the last layer.


12.Once you get to the last layer turn it around and pinch the bottom like this.


13. Tape around that bottom, turn it around and "fluff" the flower. There you go, now you just have to make more to fill your wreath which I will show you how to make.


14. Grab your cardboard box, break it down flat. Grab something that you can use to make a big circle. A bowl, a pan, anything as long as its as big as you want your wreath to be. Trace your circle on all 4 boxes. I can only trace half a circle on each cardboard box. I used 4 to layer it. I dint want it flimsy.


15. Cut those out.


16. I measured 3 inches into each circle and cut out the middle. I got way to involved in this step and I forgot to take pictures. The point is to make a big ring with the cardboard boxes.

17. Once you have your ring, staple it together so you have a solid ring, it should not be to flimsy.

18. Once that is done, all you have left is use your glue gun and arrange and glue your flowers to your ring. Repeat steps 1-13 if you need more flowers. Good luck, and don't do this on the floor like I did or your going to have a very sore back by the time your done.


* The heart pillows were a last minute add in to break up the monotony of the pink. To make a pillow see my tutorial. Don't add a lining though. The Doctor Who/minecraft/startrek symbols were added with Iron on transfers. It took me half an hour to do all 3 pillows.


So of course I needed something to match those adorable knickers I made the last week. Well I just had enough fabric to make a camisole for it. surprisingly this turned out quite well considering it was the first try.


Materials:
1. Freezer Paper
2. Well fitted shirt/tank top/camisole (template)
3. Fabric you want to use for your top. Mine was left over fabric from last weeks Knickers tutorial, I wanted them to match after all.
4. Usual sewing accessories
5. Sewing Machine
6. Coordinating thread
7. Roll of coordinating ribbon.I used the ribbon that was already on the dress. I simply used my seam ripper to remove it off the fabric.

*Please read all directions before starting project.


1.Grab your freezer paper lay it out. Fold the top you intend on using as a template in half from left to right.


2. Lay it on your freezer paper and trace. Add half an inch around the whole thing as I did with the knickers here. Connect dash lines and cut out. ( Sorry I kinda slacked on the pics.)


3. Grab the piece you just cut out, lay it on the freezer paper, apply enough sewing pins so it does not move, trace and cut out.


5. Grab both lay them out so its the shape of your template. Locate bottom for left sleeve (armpit section) draw a line right across to the right bottom left sleeve and cut.

6. You will only use the bottom part of the template, so go ahead and trash the "shoulders" section of your freezer paper. Lay both templates out on the fabric that you intend on using as the front. Pin it on the wrong side of the fabric. The inside part once its all sewed.


7.Carefully cut it out.


8. Use pins and freezer paper to do the same thing to the fabric that you intend on using as the back of the camisole. And cut out.


9. Grab the front part of your camisole and in front of a mirror put it against you. Decide how long you want the slit in the middle. Don't forget you have a seam allowance so add that. Once that is decided, mark it with your fabric pen and cut.

10. Lay front and back part of your camisole down with the wrong side facing you so you can measure your half an inch seam allowance on the top part and pin.


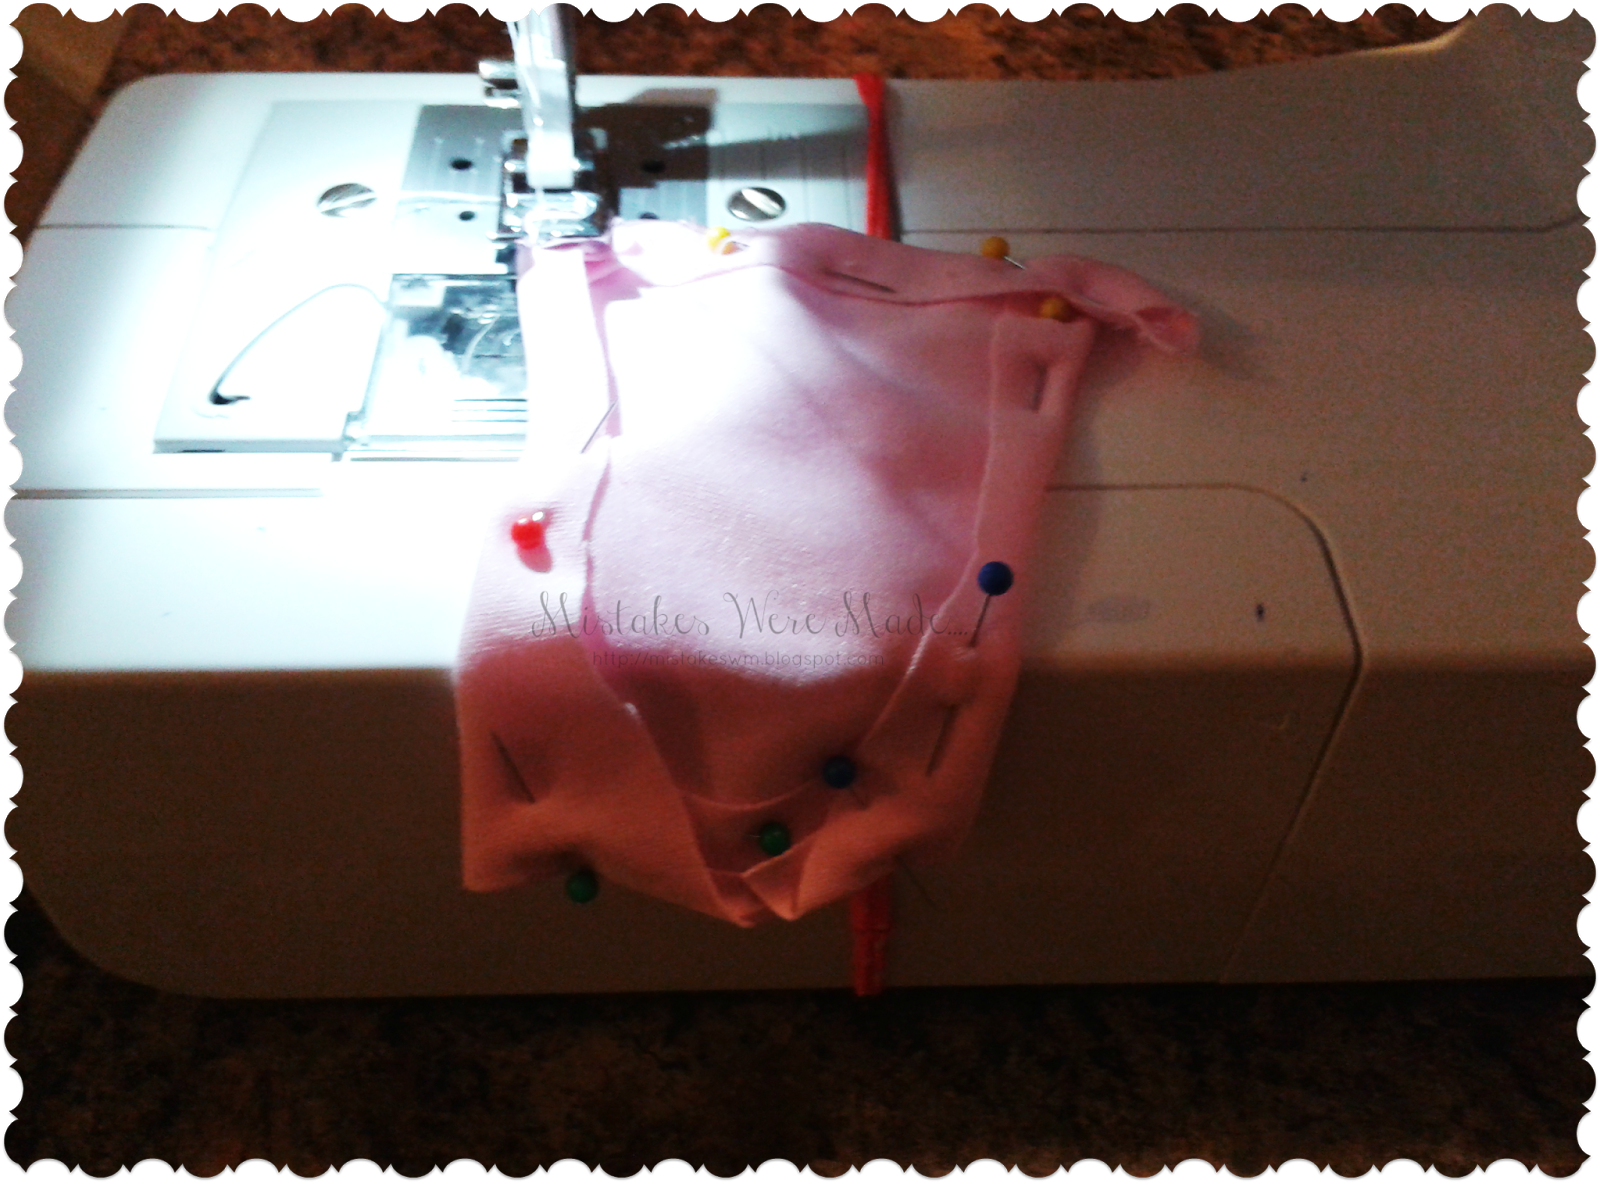
11. Take both to your sewing machine and sew with zigzag stitch. When you do the front make sure you stop sewing at the slit you made and restart again on the other side of the slit. We need this open. You should be able to slip the ribbon though both front and back parts.


12. Once both top parts are done, grab the front of your camisole. With the wrong side of the fabric facing you, fold the slit so it makes an upside down triangle. Pin and sew.


13. Grab both front and back lay them out wrong side facing up. With your half and inch seam allowance pin and sew. Not together, separately.

14. Grab both front and back. Lay on top of each other with wrong side facing out. Measure 1/2 and inch seam allowance on both sides and pin.


15. Carefully sew sides with zigzag stitch. But start under the top tube, You want to be able to put a ribbon though this so don't sew it shut.


16. Grab your seam ripper and attach one side of your ribbon to it and put top back on. The seam ripper will help you get the ribbons though the camisole tubes you made.


17. Go to the slit in the front, push seam ripper though the tube. Go all the way around the back til you get to the other side of the slit then tie ribbob in a bow.


18. Grab some more ribbon, attach it once again to your seam ripper. This time when you push it though the tube start at the armpit part. only push it though the front fabric. Start from right part, go all the way across to the left part including the slit in the middle. These ribbons will be tied from the bottom part of your armpit to behind your neck.


19. See what I mean about the ribbons, a bit of a clearer picture for you. One bow should be tied in the middle of the little v you made. the other bow should be used as a strap.


20. And that's it. You have yourself a cute little camisole to match your knickers :)


Don't forget to have fun and you should go clean out your closet. Use the fabrics of everything you no longer need. You can learn a lot about sewing just deconstructing items. About how they are made and what stitching to use. Plus you have no idea how much material ( fabric, elastic, buttons) you can get just by doing this. Just remember make sure its something you don't need...lol

OK guys, this tutorial will be long and at times a bit difficult, at least for me it was.

It will be hard,but just keep in mind when you just want to say " No More!" think about what you are learning.

You are learning to make something that every woman needs. And as far as I am concerned every woman should know how to do. No, not because they might be a Zombie apocalypse and we might be without this and that, no... You should know how to do this so you can make and get exactly what you want.

Imagine being able to design and personalize and make your own underwear. Seriously!!! Do you realize what kind of power that wields?

It's so empowering to be able to get exactly what you want by making it.

Yes it will probably take you more than a few tries to get what you want, but imagine when you do get there.

My point is stick with me, this tutorial is worth it I promise you. If you don't do it the first time you try this, keep going I'm sure there is plenty of fabric around your house you can keep practicing on.

Keep trying til you get it because you are going to feel like a dam super hero once you get it right. I'm still practicing, Yeah I started sewing late October last year, but I am still such a beginner.

So as you can tell today we are making our own knickers!! Woot! Just in time for Valentines day!

I made sure I posted this soon enough so you would get plenty of practice before the big day comes. And if there is no other half, hell everyone feels pretty with cute little knickers on especially knowing you made them.

I'm sure this is not the only way to be able to make these, but this is how I figured and learned to do it. Pretty much trial and error. this is officially my third try making them.

First try, I made them out of that flannel sheet that I also used to make my Wrist watch Pin Cushion. They were comfy, but my sewing machine was acting crazy so these was extra thread everywhere and the stitching was horrible ( more than the usual).
Second try I once again used a flat sheet, this time it was purple but it was not flannel ( just a normal sheet). Made them exactly as I made the first one. Went to put them on and the fabric did not stretch (duh) and I also used a different stitch and Bam! The side seams tore the fabric before I could even get them on. Yeah... that did really well for my self esteem.

I am happy to report that the 3rd try was perfect, I loved how they fit. Nothing tore and they looked super cute on me. And now I can finally post this tutorial since I have had success :)


Materials:
1. Fabric you intend on using. (Mine is from an old dress that one of my girls donated me, I thought it was the perfect fabric for Valentines day).
2. Sewing machine and your usual sewing accessories
3. Coordinating fabric
4. Enough cardboard to trace front/back/liner of your Knickers ( Used two of hubbies beer box I was saving).
5. Something to trace with
6. Freezer paper or any paper you can trace on.
7. Elastic for waistband ( I got mine off a fitted sheet that I deconstructed for a different project)
8. Knickers that you like the fit and style of
* Please read all directions before starting project


1. Take the knickers that you like the fit and style of and trace the front and back on the cardboard. I actually cut mine on the side and bottom seams to make this easier. I dint mind sacrificing them for the project.


2. Once they are both traced, take your ruler and measure half an inch around the front and back of what your traced. Mark it with a dashed line as I did in the picture above.

3. Connect your dashed lines, now you have your half an inch seem allowance. Mark with arrows the direction your pattern should be and also label the front and the back so it will not confuse you later.


4. Cut both front and back out using your seem allowance.


5. Take the knickers that you were using to trace everything and lay it out so you can trace the lining. The fabric that you use for this should be Breathable. Add dash line for 1/2 inch seem allowance, connect them and cut out just as you did with the front and back.


6.Grab your freezer paper and take the 3 cardboard pieces and trace it.


7.Get your fabric prepared. Iron it if you haven't already. I got my fabric from deconstructing a summer dress, no iron needed thankfully.


8. Cut out all your patterns on the freezer paper.


9. Pin your patterns on the fabric you want them on.


10. Pin the pattern all the way around. you are going to be cutting this out by hand, you want to make sure you have an exact copy.


11. Do this with all your patterns.


12. Cut it all out and carefully take the pins off the patterns and freezer paper.


13. Take the front piece,find the inside part(the part that is going to be touching your skin) measure half and inch and pin. Do this all the way around your fabric for your seem allowance, but do the top part where your elastic is going to be last.


14. Do this to the other 2 pieces also. Hang in there, we are more than halfway. I know its a pain but its worth it.


15.Take your knickers lining (smallest piece) and sew all the way around.Do a better job pinning it unlike me..lol also make sure you take the pins out as you sew, otherwise it will ruin your sewing machine.


16. Take front piece and bottom piece and line them up. Wrong side should be facing up.


17.Quickly pin together. Both outside parts should be facing each other.


18. Sew together using your seem allowance. use Zig Zag stitch so it can stretch if it needs too.


19. Using your seem allowance sew the leg parts of both your front and back. DO NOT do the top parts where your elastic is going yet.


20.Take your knickers lining and place it between the front and back parts ( You know where it goes) and pin it.


21. Almost done!! Line it up appropriately while you sew it on. Just go over the seams that you have already done on it.


22. Now do the sides that touch your hips. Make sure your on the inside part of the fabric. Use zigzag stitch so it can stretch if it needs too.


23.When you turn your fabric right side out this is what it should look like.


24. Turn it wrong side out again and grab your elastic and slip it into the seem allowance on the top and pin it.


25. Go back to your sewing machine and slip it under the foot, take your pin off while doing so. It should keep your elastic in place. Stitch your zigzag stitch for about half an inch, then go over it backwards so it stays in place. As you sew the elastic under the fabric ( lining it up as you go) stretch elastic (not to much though).


26. You can go all the way around fabric if you want with the elastic or you can stop once you do the front then cut. Then do the back part the same way, its up to you. Cut any extra thread that's hanging on and your done!!!!


Like I said before we started this whole thing if you don't get the results you want the first time, do it again. remember this is my 3rd try and there was a lot of contemplation on what I did wrong between the 3.
Keep your cardboard patterns, the next time you want to make another one you have it and when you trace it on paper you can change the design ( smaller hips straps or whatever ) and cut it out that way. Good Luck and Have fun!!